Metal Roofing Installation
Sturdy, durable, and built for longevity
Metal roofing is an excellent choice of roofing – it is sturdy, durable, and built for longevity. Moreover, metal roofing is easy to install, can endure harsh weather conditions, and is safe and lightweight, often weighing between 1.25 and 1.50 pounds per square foot.
The Basics of Metal Roofing
Fast and efficient, metal roofing installation is also cost effective. Whether you utilized metal shingles or metal sheets, the basic materials are all ready to use. And fast installation means that there will be far less time that your home is uncovered, reducing worry about inclement weather exposure. For installation tools, the basics are simple: just use shears, drills, and snippers.
Metal Sheet Roofing
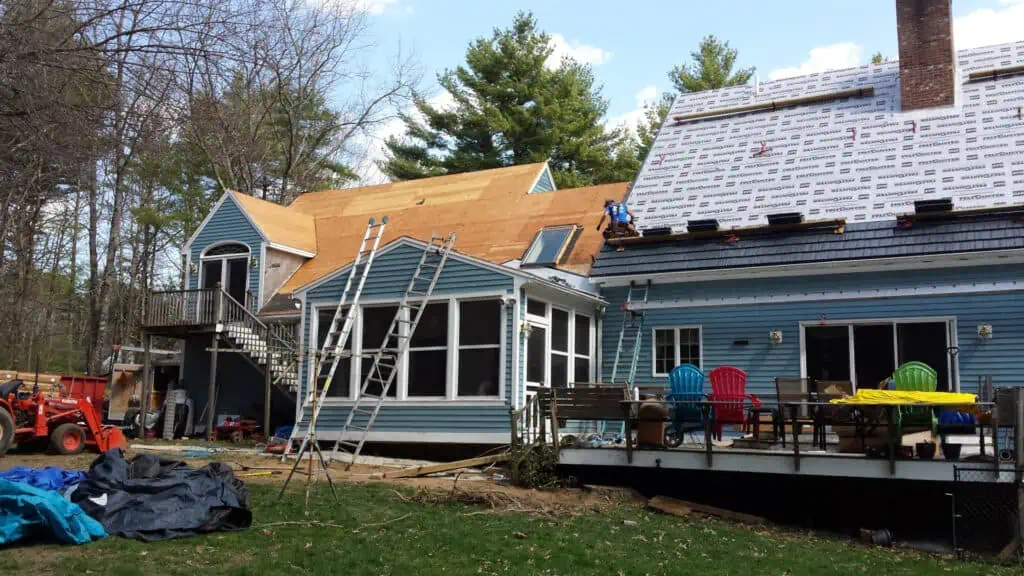
Unlike metal shingles, you will need to remove old roofing material before installing metal standing seam roofing. Use a synthetic and breathable underlayment for your roof. Don’t use standard tar paper. It could disintegrate and stick on to your metal standing seam roof. Also, be sure your roofing deck doesn’t have any exposed nail heads. Then install your roof underlayment with a six inch overlap.
When installing metal sheet roofing, start by installing roof anchors with heavy duty steel screws or double headed nails. Attach over the ridge, nailing onto the roof rafters. Install a minimum of three anchors for an average home.
- Install roof anchors with heavy duty steel screws or double headed nails
When you install metal sheet roofing, you always start with the drip edge. The first step is prepping of the roof deck. Remove the old drip edge, then install the underlayment, then the drip edge. Use nails or screws for the installation process. Be sure to have each separate section overlap two inches at least. Be sure to install the drip edge along every eave.
- Prepping the roof deck
Now you’ll install the gable trim. Sometimes roofers prefer to install it at the end of the installation process instead of at the start. This is your choice, and it depends upon the way in which you lay out the roofing panels. So, after you have laid out either your last or first panel, you will line the panel to the rake board. That way it can be hooked to your gable trim. You may use a drip edge instead of a customized gable trim for this step.
- Install the Gable Trim
Next step: install your first panel.
This installation step is vital in so that you can keep your roof paneling square.
Carefully hook the first panel to the drip edge, aligning it with the rake board. Then install one screw through the pan at the top of the panel to hold it in place while panel clips are secured. You should use flat head screws when attaching a panel to the deck of the roof.
With that first panel in place, snap on the next panel, making sure that roof panel seams are snapped. Repeat this process with every panel on one side of your home and then repeat it again when you roof the other side of your home.
As you are installing your panels, cut your z-bar to the width of one panel. Make sure it fits tightly, but not so tightly that it scratches the next panel.
Then, once you have your z-bars up and sealed, you’ll take a section of the ridge cap, cut a line down the center and cut two inches from the end of the lock. Bend down the two flaps, and this is your end-piece.
Next, address the vent pipe. To do so you should use a pipe boot that has been properly sized. It should have a flexible bottom. You will need to cut a hole in the panel surrounding it to make it fit. The next step: you must install the pipe flashing. You must caulk it. Do so by using a solar seal.
Installing Metal Shingle Roofing
When you install metal shingle roofing, you get a time saving bonus. You can place it right over existing roofing materials. If you do remove old roofing, be sure to use a synthetic underlayment versus tar paper when you start from the roof deck.
Your next step involves installing a drip edge. Also install starter flashing. You’ll want to make sure the flashing is secure by hammering in nails at intervals of about twelve inches. Next you should install gable flashing. To install the flashing use nail spacing of half an inch. Be sure to overlap the drip edge.
The next step: chimney and wall flashing.
To install, you will need to pre-cut the vent pipe openings and ridge vent space.
Once you start installing the shingles, you should draw lines using chalk. These can serve as a guide so that you’re installing the shingles nice and straight.
Begin at the left side of the gable, using half of a full shingle. Then follow with a full shingle until a row is complete. Begin the second row with a full shingle to the end of that row.
Use a diagonal installation pattern, that way you can raise the rows of shingles gradually.
When you reach the roof ridge, the next step is to flash the end walls, as well as any sky light or chimneys, and then install the ridge vent. Cover that with an interlocking ridge cap.
Click here to read more on how to install a metal roofing.
Call Us Today!
CUSTOMER TESTIMONIALS
We recently had Armor Metal Roofing install a new metal roof. Glenn was professional, knowledgeable and helpful as we discussed options and selected the materials. The crew that installed the roof was top notch, from removing the old roofing being careful not to damage a new deck to the quality work they did installing the new roof. The quality of their work was tested the day after installation as several days of rain and high winds came through. Very happy with the roof and the entire experience dealing with the company.
 Mike
MikeMay 5, 2023